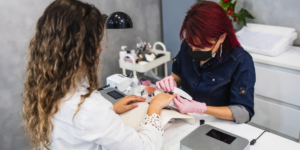
Whether you’re a nail tech or a beauty enthusiast looking to achieve salon-style nails at home, learning how to prep, size, and apply nail tips is essential. This step-by-step guide from Luminous Nail Bar will walk you through the process, ensuring long-lasting and professional-looking results.
Why It’s Important to Know How to Prep, Size, and Apply Nail Tips
Knowing how to prep, size, and apply nail tips correctly is crucial for achieving strong adhesion, durability, and a natural look. Poor preparation or incorrect sizing can cause nail tips to lift, break, or appear uneven. By understanding each step, you can avoid common issues and enjoy flawless nails for weeks.
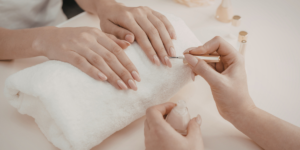
Step 1: How to Prep Your Natural Nails
Proper nail preparation lays the foundation for successful tip application. Here’s how to get started:
Sanitize and Clean
Begin by washing your hands and sanitizing your tools. Disinfect the nail surface using high-grade alcohol or a nail-prep solution to eliminate oils and residues.
Push Back and Trim Cuticles
Use a cuticle pusher to gently push back your cuticles, then trim any excess with a nipper. This allows the tip to sit flush with the nail bed.
Shape and Buff
File your natural nails to remove length and shape them to match the tips. Buff the nail surface gently to remove shine and create a rougher texture for better glue adhesion.
Dehydrate and Prime
Apply a nail dehydrator followed by a primer. This step removes oil and moisture, ensuring the tips bond securely to your nails.
Step 2: How to Size Nail Tips Correctly
Correct sizing is a vital part of how to prep, size, and apply nail tips. Nail tips should fit perfectly from sidewall to sidewall without overlapping the skin.
Measure Each Nail
Select nail tips that match both the width and shape of your natural nail to ensure a snug and seamless appearance. If a tip is slightly too big, gently file the sides for a perfect fit.
Consider the C-curve.
Make sure the tip’s curvature matches your natural nail’s shape. A good fit ensures better adhesion and comfort.
Layout and Organize
Once you’ve sized all ten nails, lay them out in order to streamline the application process.
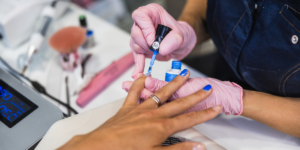
Step 3: How to Apply Nail Tips Securely
Application is the final and most rewarding step in learning how to prep, size, and apply nail tips. Here’s how to get a strong, salon-quality hold:
Apply Nail Glue
Apply a thin layer of adhesive to the well of the nail tip, concentrating on the contact point between the tip and the natural nail. Avoid using too much, as it can seep out and make a mess.
Press and Hold
Position the tip at a 45-degree angle and press down firmly, ensuring there are no air bubbles. Hold for 10–15 seconds until secure.
Trim and Shape the Tips
Once all tips are applied, trim them to your desired length using nail clippers. File the edges and shape the tips to match your style (coffin, square, almond, etc.).
Blend the Seam
Use a fine-grit file to gently blend the tip’s seam into your natural nail for a smooth transition. Be careful not to file too much, which can weaken the tip.
Tips for Long-Lasting Nail Tips
- Avoid water for at least one hour after application.
- Regularly massage cuticle oil into your nails and surrounding skin to support hydration and nail vitality.
- Wear gloves when doing household chores.
- Avoid using nails as tools.
Common Mistakes When Learning How to Prep, Size, and Apply Nail Tips
- Skipping prep steps, leading to poor adhesion
- Choosing the wrong size, causing discomfort or lifting
- Using too much or too little glue
- Rushing the process, leading to uneven results
Conclusion
Learning how to prep, size, and apply nail tips is a game-changer for anyone interested in nail enhancements. With the right techniques and products, you can enjoy strong, beautiful nails that last. Trust the professionals at Luminous Nail & Beauty Bar to deliver expert care and stunning results every time. Visit Luminous Nail Bar for professional services and expert care to take your manicure to the next level.